Welcome!

This is the place I try to make my creative visions match the physical world.. watch while I sometimes fail and sometimes succeed!

Thursday, October 24, 2013

Finished Freakshow Quilt


Finished project


To see the history of this quilt project see Freakshow Quilt which tells how I started this quilt. This was a long journey, and I still need to go back and patch a few spots where the material frayed a bit on washing. I can't say how much I learned making this quilt! PS. the name Freakshow came about because this is a suzuki samurai 4x4 but the motor is a toyota.


Casey, pretending to be a cat.

More Odds and Ends

A few more odd's and ends projects. Some tooth fairy pillows I made for a friend of mine... needs some tweaking though, as I'm not liking the lips. The lips hold the tooth/change and they may not be strong enough if one was to use all change.. but who am I kidding, aren't kids getting bills these day instead of the quarter we got growing up?
These are a bit girly as well. I'd love to figure out something a bit more masculine. Perhaps something with wire in the wings so they aren't so frilly!

I'm also working on some project bags for a friend (shhhhh it's a secret) who I'm going to visit in November. She knits up a storm but having some bags to protect the wool projects from fading and dust is important. Apparently knitter's work on multiple projects too! I feel a bit less guilty about my many projects!


I also spent 8 weeks or so attending an agility course with Tucker, the wonder dog. He excelled at the class, but he was actually to fast and we actually had to work on slowing him down. And as a fat lady, I could not.keep.up. But still so much fun. If you have the chance, join agility! There were all kinds of dogs, from small fluffy puppies to old fat labs!


Wednesday, October 23, 2013

A Few Odds and Ends

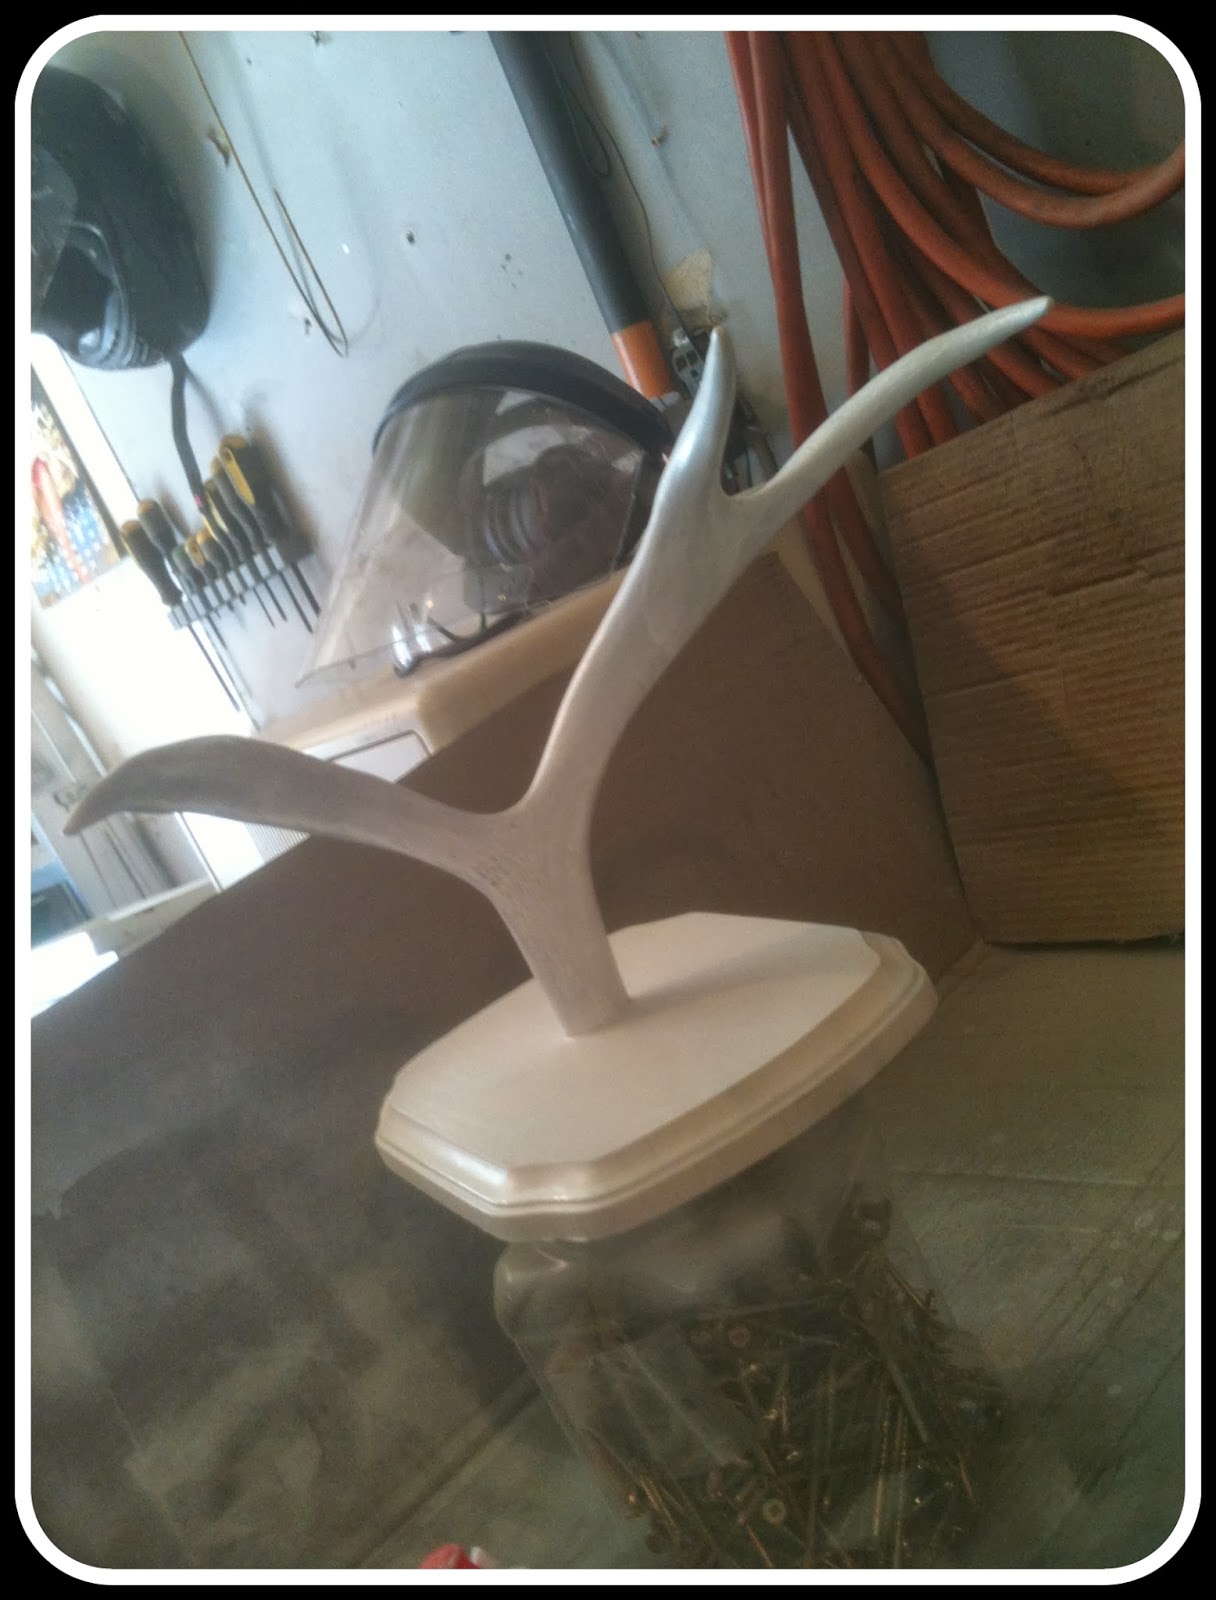
A few random projects to catch up on. While out quadding, Todd found this antler and brought it home. Casey promptly hid. For some reason she's terrified but fascinated with any antlers. I eventually decided to mount it on a plaque after seeing something on pinterest.


I found the wood plaque at Michaels for a few dollars and Todd helped me drill a hold into the antler so it wouldn't split when I screwed it onto the plaque. He's very helpful that way! I then sprayed the whole thing white. He doesn't understand this as he likes things 'natural' - but he still goes along with my ideas :)


This now hangs in the bedroom where I promptly hung one of Todd's hats off an antler. This adds to our slightly 'country' decor in the bedroom. I'm not really into country per se, but we have three cross stitches that Todd's mom made for us (two wolves and an Indian chief) and some other objects.. it's *very* loosely country, and I think of it more of outdoorsy.


I also redid an old farm desk, that weighs about three million pounds (according to *some* people haha) and seems to be made of old doors. I color matched an old can of paint that had gone 'funny' and I'm loving it! It's very deep, and while sewing there is ZERO desk movement!


 The light is not very good in this picture, but the shelf in the picture below is the same color of glossy grey.


A product I like a lot is the Dritz Yellow Marking Pencil.  I have been through so.many.pencils.
Seriously, I have probably 10-15 different pens and pencils. And some of them are ok. The Nancy Zieman washable felt (I think it's by Clover) is alright, but the ends tend to get funky and you can't iron over top as it might not wash out afterwards. The Dritz pencil marks so clearly and tends not to fade after being handled. I don't like the fact that the 'lead' seems to break so often after sharpening but hey, I've found that problem with normal pencils and pencil crayons as well! I recently picked up the dark colored pencil and that seems to be working well too!


Third Time's the Charm!

Well after attempting to do photo transfer using three different methods, the third time's the charm. I had success with the Bubble Jet 2000 solution and printing directly onto the fabric. I had to work a bit to get the fabric to run through the printer. I had ironed the fabric to freezer paper, but I found I had to tape it to a piece of paper as well. On top of that, I could only print one photo per piece of fabric as when I attempted to print two on one sheet, the first one always screwed up, either going through the printer, or the ink.
I've washed the photos a few times now and the fading is really minimal. I'm impressed and I can foresee some exciting projects using this method (I also have a lot of liquid left I don't want to waste!)


(not sure why these shots are blurry, but my lighting was a bit dodgy!)
(and I think the blanket needs to be ironed!)


My photos aren't really doing the job - the photos in the quilt look MUCH better then my previous attempts.


These two above show the previous attempts


Monkey Love! I just have one line of sewing to fix up and then I'll be mailing it! Well this has been quite an adventure experimenting with photo transfer. My conclusion is I would definitely make one again using my final method, the Bubble Jet 2000 solution!